Near Match Resolution
Resolve Near Matches
Open a record to view the Source Record and the Near Match information. From here you can begin your analysis and review of records before assigning an FLEID or resolving a record to the associated Near Match.
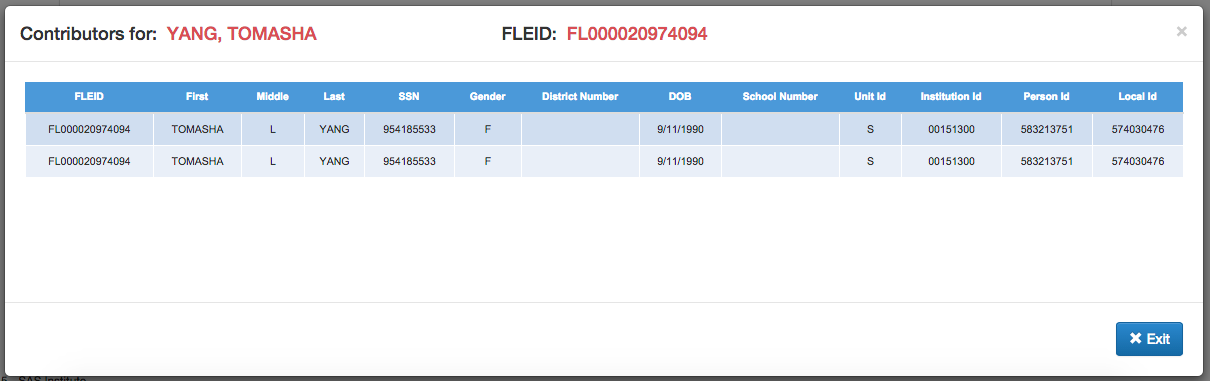
View Contributor Records
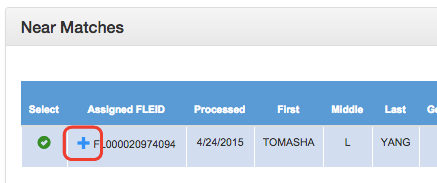
Click the plus sign icon next to the FLEID to view the Contributor Records.
Click Exit to return to the Source Record/Near Match screen when you are finished reviewing.
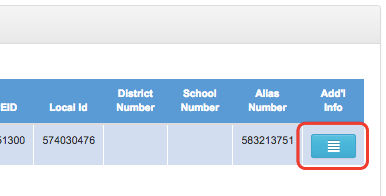
View Additional Information
Click the Add'l Info icon in the last column to view any information not visible from the Source Record/Near Match Record screen.

Resolve a Near Match
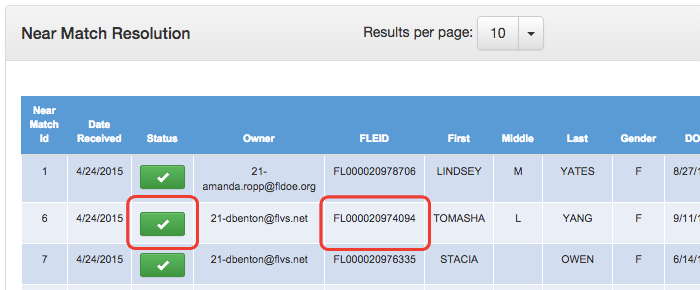
Once your review and analysis of the record is complete, you may decide to resolve the Near Match with the Source Record. Resolving a Near Match will assign the Source Record's FLEID to the Near Match in question.
- Click the checkmark icon in the Select column of the Near Matches list.

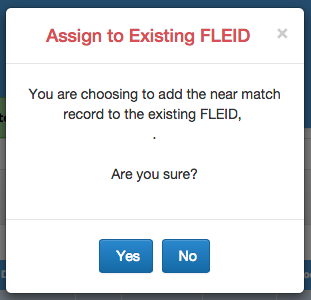
- Click Yes to confirm the assignment to the existing FLEID.
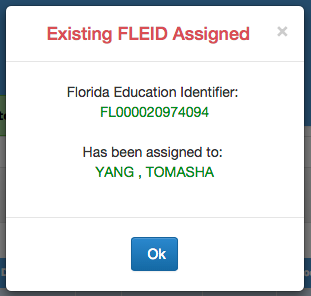
- The existing FLEID from the Near Match Record displays, showing where it has been assigned. Click OK.
- The Source Record used during your review and analysis is now a Contributor Record to the Near Match. The Near Match Record status changes to Resolved and the FLEID is displayed in the "FLEID" column.
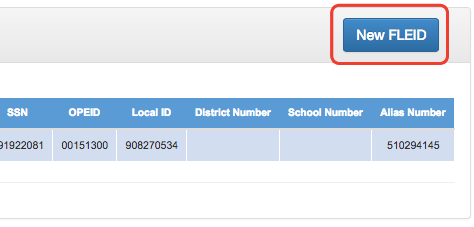
Assign a New FLEID to a Record
If the Source Record is not the same individual represented in the Near Match record, you may need to create a new FLEID for the Source Record.
- Click the New FLEID button in the upper right corner of the Source Record result list.
- Click Yes to confirm issuing a new FLEID.
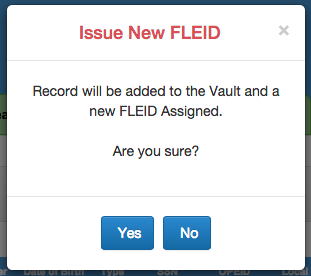
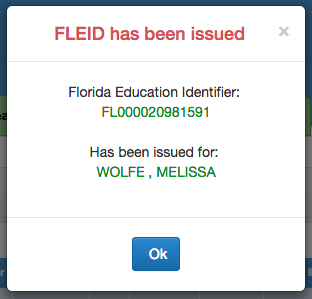
- The Source Record has been assigned a new FLEID and the number is displayed. Click OK to complete the action.
The record now shows as Resolved.